Follow the steps below to launch e² studio.
- Start e² studio from the start menu.
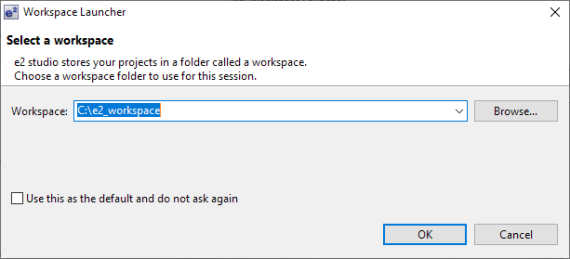
By default, it starts from [Start Menu] → [Renesas Electronics e2studio] → [e2studio]. - When the [Workspace Launcher] dialogue opens, specify the downloaded Workspace folder and click [OK].
- When you start e² studio for the first time, do the following:
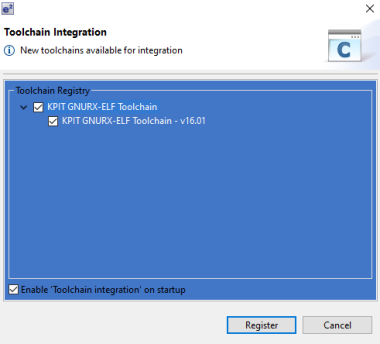
- The [Toolchain Integration] dialogue shown below is displayed.
Select KPIT GNURX-ELF Toolchain – v16.01 and click [Register].
- When "It is mandatory to restart e2 studio after e2 studio update is completed." message is displayed, click [OK].
- When e² studio restarts and the [Workspace Launcher] dialogue reopens, just click [OK].
- The [Toolchain Integration] dialogue shown below is displayed.
-
The e² studio screen is displayed, and the projects contained in the workspace are displayed in the [Project Explorer] view.
The first time you launch e² studio, you will only see the Sample project (OPH5000EN).
*If the sample project (OPH5000APP) is not displayed in Project Explorer, please import the project using the steps below.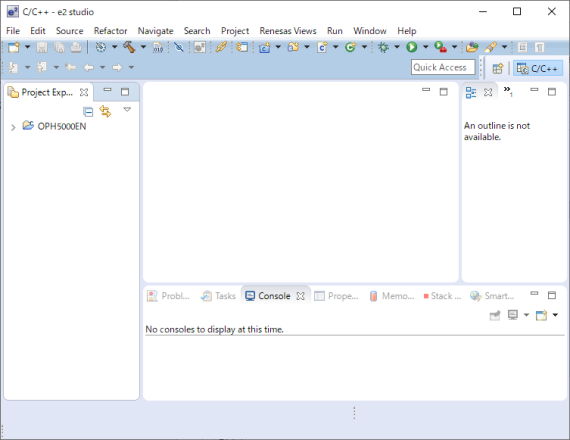
-
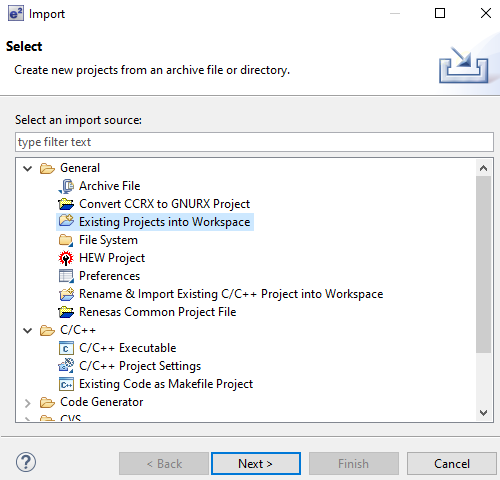
From the [File] menu of e² studio, click [Import] to open the Import Wizard.
-
When the [Select] page of the Import Wizard is displayed, select [General] → [Existing Projects into Workspace] and click [Next].
-
When the [Import Project] page is displayed, make the following settings.
- Select [Select root directory].
- Click [Browse] button and specify the project folder to import.
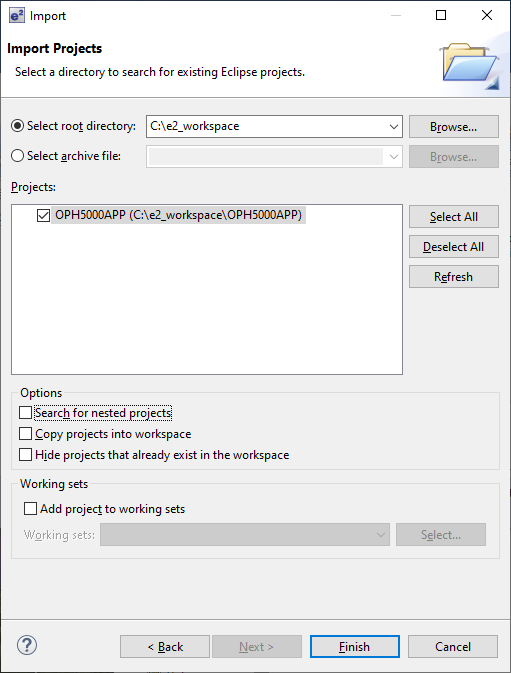
- Click [Finish] to import the specified project into the workspace.
-
From the [File] menu of e² studio, click [Import] to open the Import Wizard.
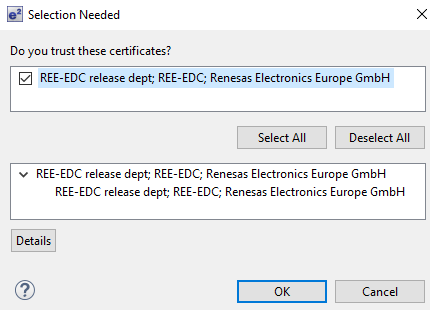
When the [Selection Needed] screen appears, select the REE-EDC certificate and click [OK].
Last updated: 2020/12/08