The Remote Installer is a program for Windows that updates the system software of the OPH-5000i connected to the PC with a USB cable.
This program is used when updating to the system software of System E6.0 or later.
- This program supports Windows 10 (32bit, 64bit). Other OS is not supported.
- To use this program, .NET Framework 4.6.1 or later must be installed.
- Depending on the performance and configuration of your PC, a communication error may occur. In such a case, try another PC.
Install Remote Installer
Each time a system software update is released, a Remote Installer specific to that version is released.
For information on how to install the Remote Installer for each version, refer to the "System software update procedure" section in the release notes for each version in the System software updates.
Operation of Remote Installer
- Launch Remote Installer
- Connect OPH-5000i to PC with USB cable
- Click the Update button
- Check the result
When the installation is completed normally, the Remote Installer will start automatically.
If you want to start the Remote Installer again after installation, open "Opticon" in the start menu and click the name of the Remote Installer (Update OPH-5000i x.x). It can also be started from the shortcut of "Update OPH-5000i x.x" placed on the desktop.
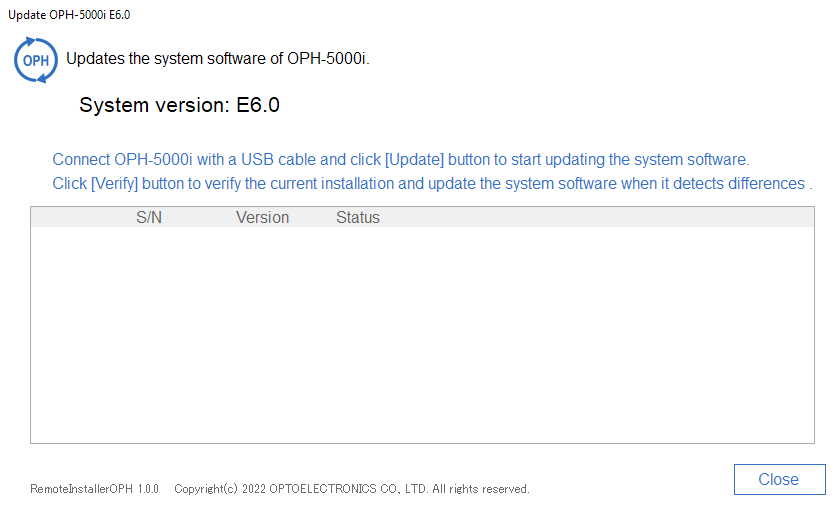
When you start the Remote Installer, the screen shown below is displayed. The screen shows the system version to install with this Remote Installer. In this example, "System version: E6.0" is displayed.
When you connect the OPH-5000i to your PC with a USB cable, the screen shown below will be displayed. In the screen example below, three OPH-5000i are connected, and the status of each terminal is displayed in the list.
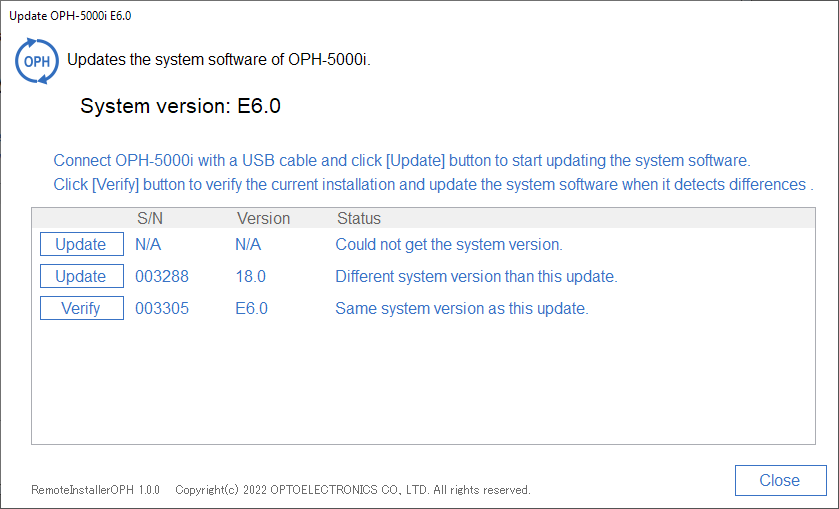
The terminal on the first line is a terminal whose system version is older than E6.0. In this case, the Update button is displayed, "N/A" is displayed in the S/N and Version columns, and "Could not get the system version" is displayed in the Status column.
The terminal on the second line is a terminal whose system version is later than E6.0. In this case, the serial number and system version of the terminal is displayed in the S/N and Version columns, respectively. In this example, the system version of the terminal is different from the system version of the Remote Installer, so the Update button is displayed and the Status column shows "Different system version than this update".
The terminal on the third line is the terminal with the same system version as this update. In this case, the Verify button will be displayed, the serial number and system version of the terminal will be displayed in the S/N and Version columns, and "Same version as this update " is displayed in the Status column.
Click the Update button to start updating the system software. When the update starts, the Status column shows the progress in the following order.


CAUTION:
Be careful not to disconnect the USB cable while the above progress is displayed, as it may cause a malfunction.Terminals with the Verify button are basically terminals that do not need to be updated, and there is no need to press the Verify button.
However, if you may have partially updated system components using a special installation method, or if your terminal may have failed to be updated, click the Verify button and try again. You can check the version of each component of the system, and if there is any difference from the system software installed by the Remote Installer, you can have the system software updated as if you clicked the Update button.
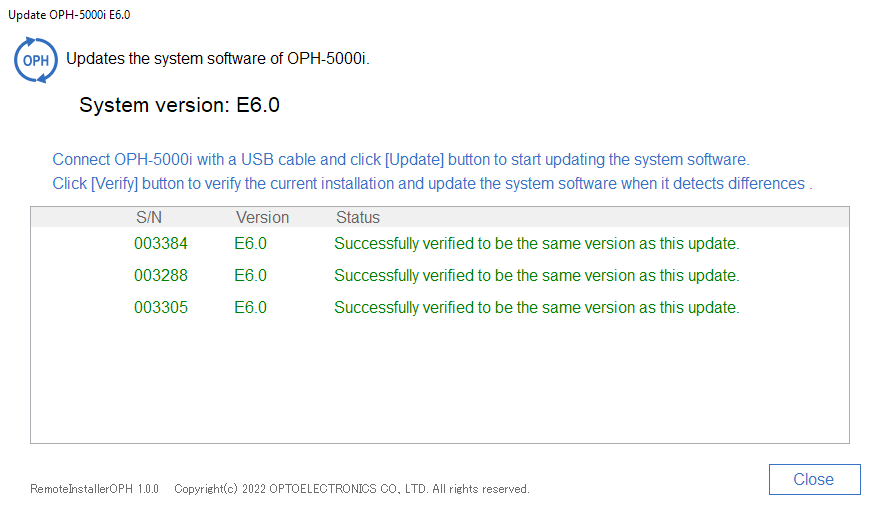
Confirm that "Succesfully verified to be the same version as this update" is displayed in the Status column.
Also, confirm that "Update Complete!" is displayed on the screen of the terminal as shown in the figure below.
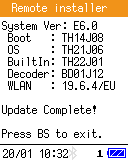
After confirming, unplug the USB cable and press the BS key on the terminal to restart the terminal.
When an error occurs...
If an error occurs for any reason, an error message will be displayed.
Example error message displayed in the Status column of the Remote Installer:
Communication timeout error!
Communication error!
Example error message displayed on the terminal screen:
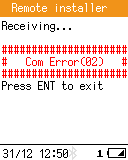
If an error occurs, disconnect the USB cable, wait for about 2 seconds, then reconnect the USB cable and try updating again.
Also, if you are updating multiple terminals at the same time, reduce the number of terminals to be updated at the same time and try again.
Last updated: 2022/04/01